

Keyword research has always been an important part of the process for optimizing a website for search performance. Even with all the algorithm changes that have occurred over the years, the importance of keyword research has not diminished.
There are thousands of ways, tools and resources out there to help you perform quality keyword research. Every SEO has their own methodology, favorite data sources and ways to organize and sort through that data, in order to create list of keywords to focus on with their SEO campaigns. But there is more to keyword research than just the research.
Effective optimization requires more than keywords to optimize; it requires that those keywords be utilized properly on the page. With optimization being less about keywords and more about topics, organizing your keywords will help you create great topical silos for optimizing content into your site.
I’ve written extensively on the keyword research process that was Hummingbird-proof long before the Hummingbird algorithm was even a thing. In this post I want to provide you with a keyword research tool that will help you take the keywords you’ve found and organize them into effective optimizable topics. You can still use your favorite keyword discovery tools, but using this spreadsheet to organize your data can be a god-send.
Setting Up Your Spreadsheet
I’m going to assume that you already have a list of keyword themes, or what I call core terms. These are the broad-level categories from which you’ll perform additional keyword research to produce a long-list of actual phrases.
For our example, we are going to use a core term of snowmobile jackets. This is just one of many core terms for a site that sells snowmobile gear. Others might be snowmobile helmets, snowmobile gear, snowmobile clothing, etc.
Once you open the spreadsheet, the first thing you are going to do is to make a copy of the Phrase 1 tab and then rename it. This allows you to keep a blank tab while manipulating the other.
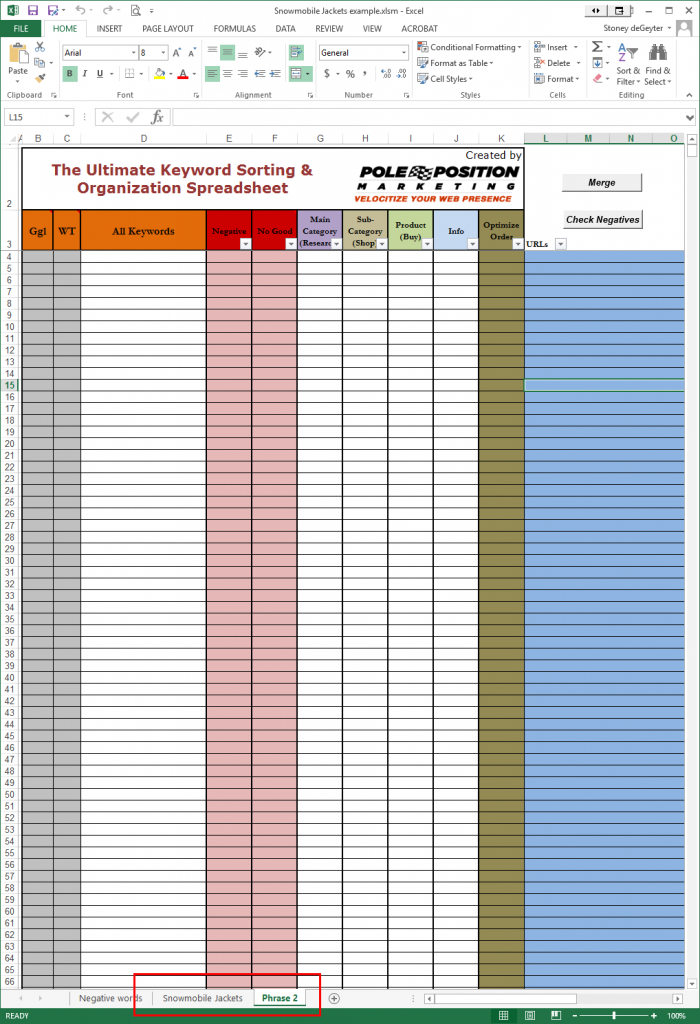
If you use the same sheet for multiple related keywords, (such as snowmobile coat), you can just keep copying the blank tab and renaming it with the new keyword. This allows you to keep similarly themed keywords in the same workbook while maintaining them on separate sheets for convenience.
Note: Ok, so I screwed up. I started using the Phrase 2 tab and only realized it after I kept all my screen captures. Ideally I would have used the Snowmobile Jackets tab instead. No matter, the data is the data. I can rename the tabs later.
Importing Your Keywords
Now you’re ready to begin importing your list of keywords. This spreadsheet is set up to handle keywords from two sources, Google (Ggl) and WordTracker (WT). You can change these to any two sources you like.
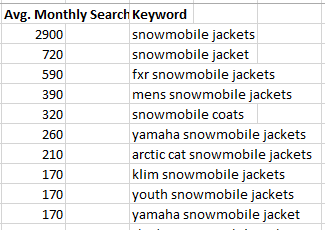
You first need to export your keyword lists from the research tool of your preference into a spreadsheet. Then, organize that sheet to make sure the search volume number is to the left of the keywords. For the first set of data (Ggl, for our document) you want to make sure there is a row between the search volume so you can do an easy copy/paste.
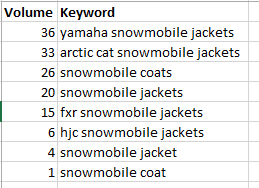
For the next set of data, (WT) you want the search volumes in the cell immediately to the left of the keyword.
Now you can copy all the data from these two exports and paste them into your new sheet. Be sure to put your cursor just under Ggl for the first import. To import the second set of data, scroll to the first empty row and put your cursor in the WT column to paste.
When pasting each group, be sure to select the option that allows you to keep the formatting on the current sheet rather than importing the format from the sheet you copied from.
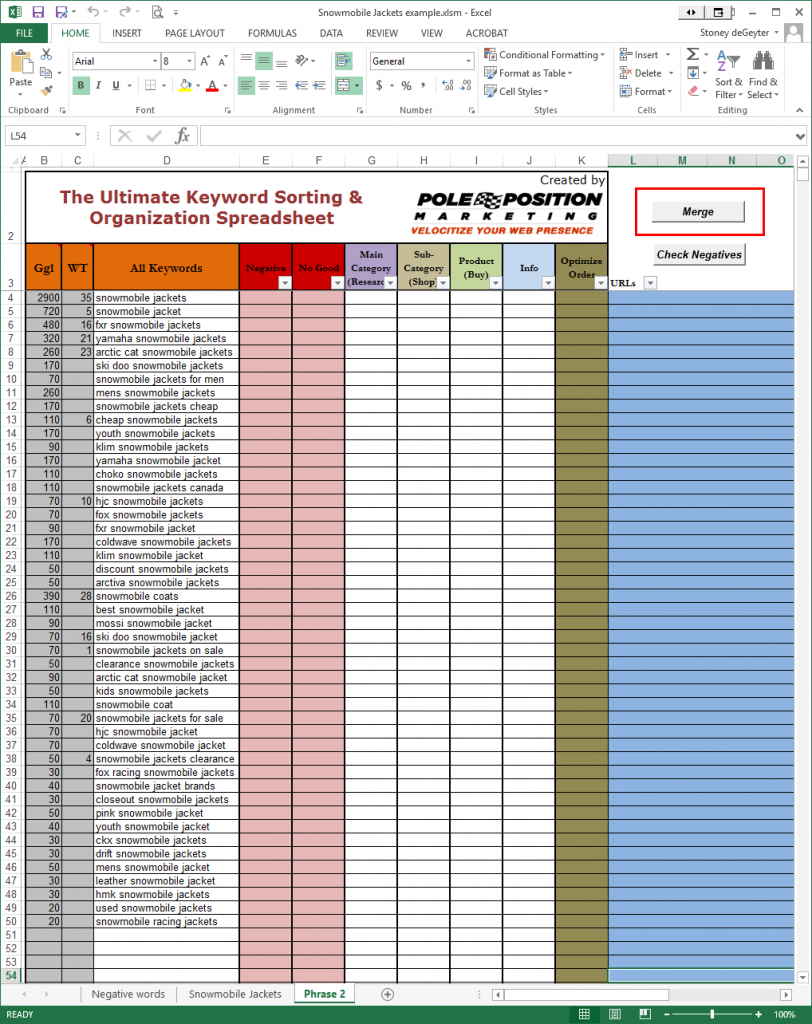
Once you paste both sets of keywords and search volume, your sheet will look something like this:
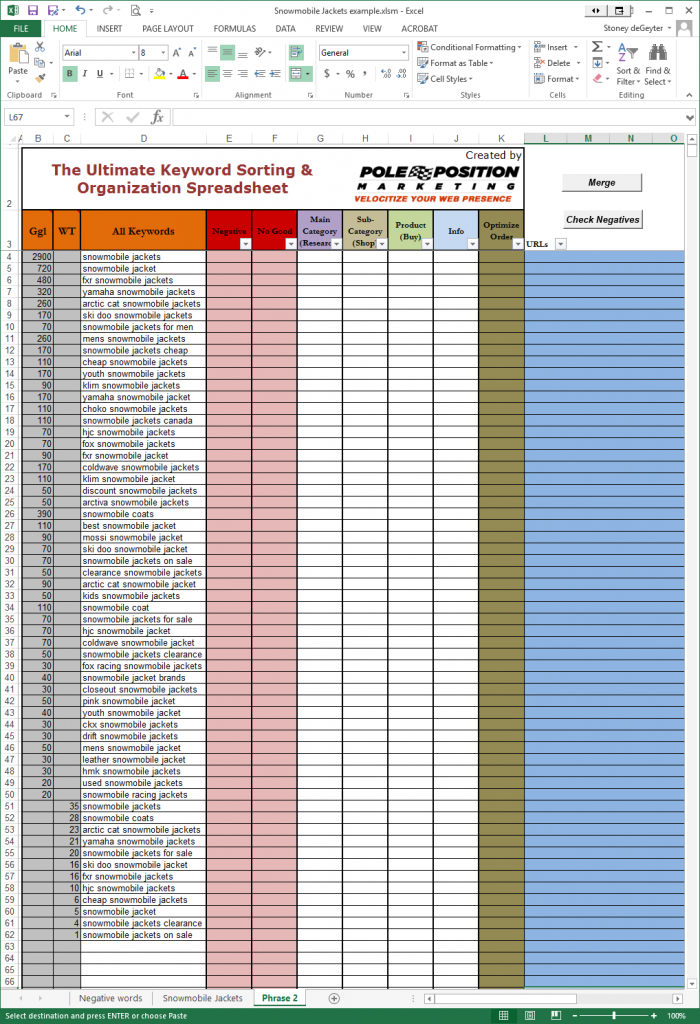
It’s not uncommon to have hundreds, if not thousands of keywords exported from these two sources. Ultimately, it doesn’t matter how big your keyword list is, provided that you’re confident it is comprehensive of the core term.
Merging Duplicate Phrases and Data
Between the two lists, a good number of phrases may be duplicated. In the example above, we have two separate search volume numbers for snowmobile jackets, snowmobile coats, and others. We want to merge these two sets of data so the Google and Wordtracker numbers are on the same row for each keyword.
This spreadsheet has a simple Merge button for this:
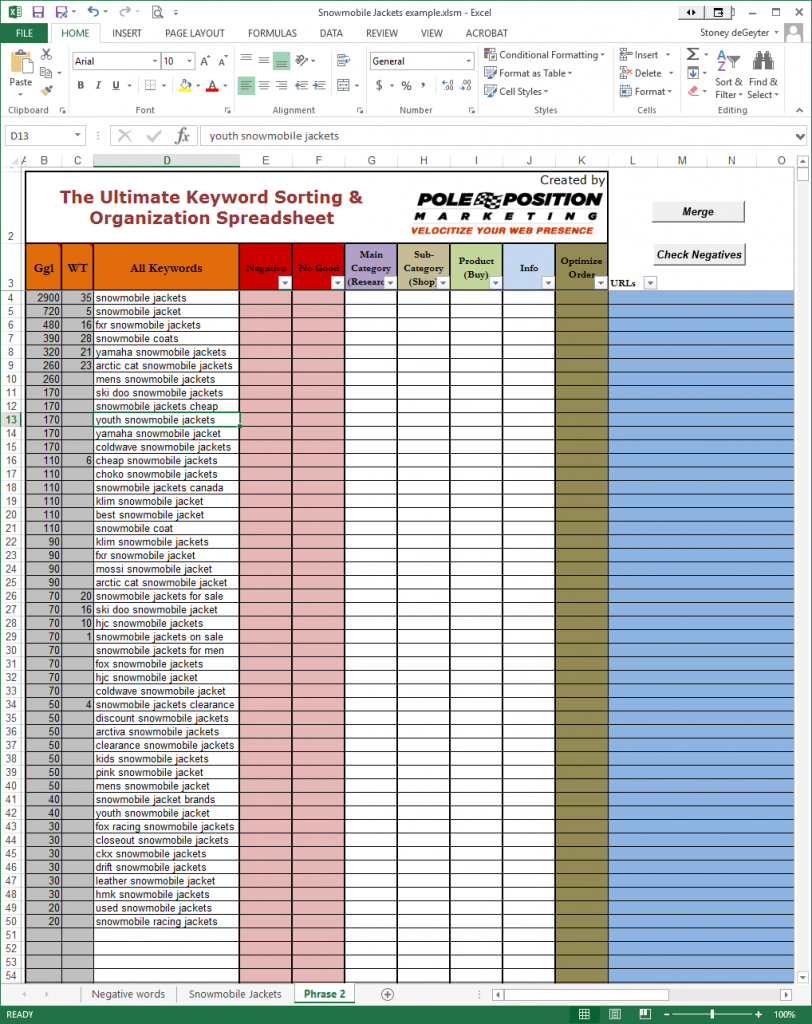
You can see that there are no longer two separate lists for Google and Wordtracker, but one list with all the data together.
The next thing I do, which is entirely unnecessary but helps me with prioritization later, is to sort the phrases by search volume. Be sure to select the data you want to sort, which is the first three columns. Place your cursor in the “Ggl” cell and then click and drag to the last keyword cell. Then go to the Sort and Filter option in Excel and click for the drop down options.

Then select Custom Sort. That will bring up a sorting dialogue box that will allow you to determine how the data is sorted.
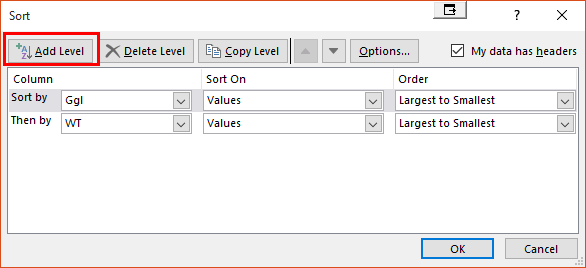
We’ll sort first by Ggl and then by WT. In the column, select Ggl and change the order to “Largest to Smallest.” Click “Add Level” and then select WT and “Largest to Smallest” again. When you hit OK, your data should be sorted properly.
Even though we sorted by search volume, we don’t want that to be our sole basis for determining the value of a keyword phrase. This is just one of the metrics used. As you can see, Wordtracker misses a lot of phrases that Google says are being actively searched. Which is right? Neither. But this does give us a decent comparison metric between the phrases.
Eliminating Negative and Junk Words
Anytime you import keyword lists this size, you’re going to end up with a number of junk keyword phrases. This spreadsheet provides an easy way of getting them out of your way without having to delete them one by one.
First, scan your list looking for any recurring words you want to eliminate. Then add those words to column A in the negative word tab.
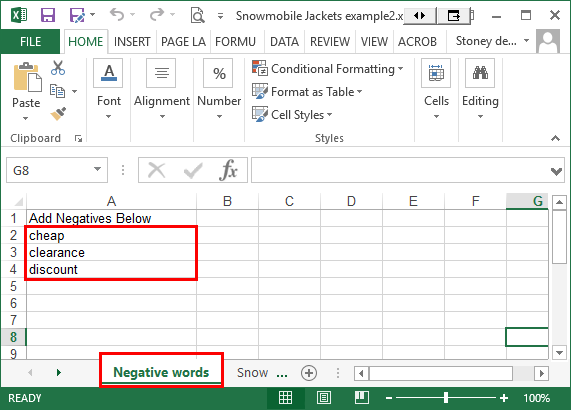
In this case, we want to get rid of keywords that don’t represent what the website sells.
Now, go back to your keyword tab and click the “Check Negatives” button. This places an “x” in the “negative” column for any phrase which contains that word, and auto highlights the phrase red.
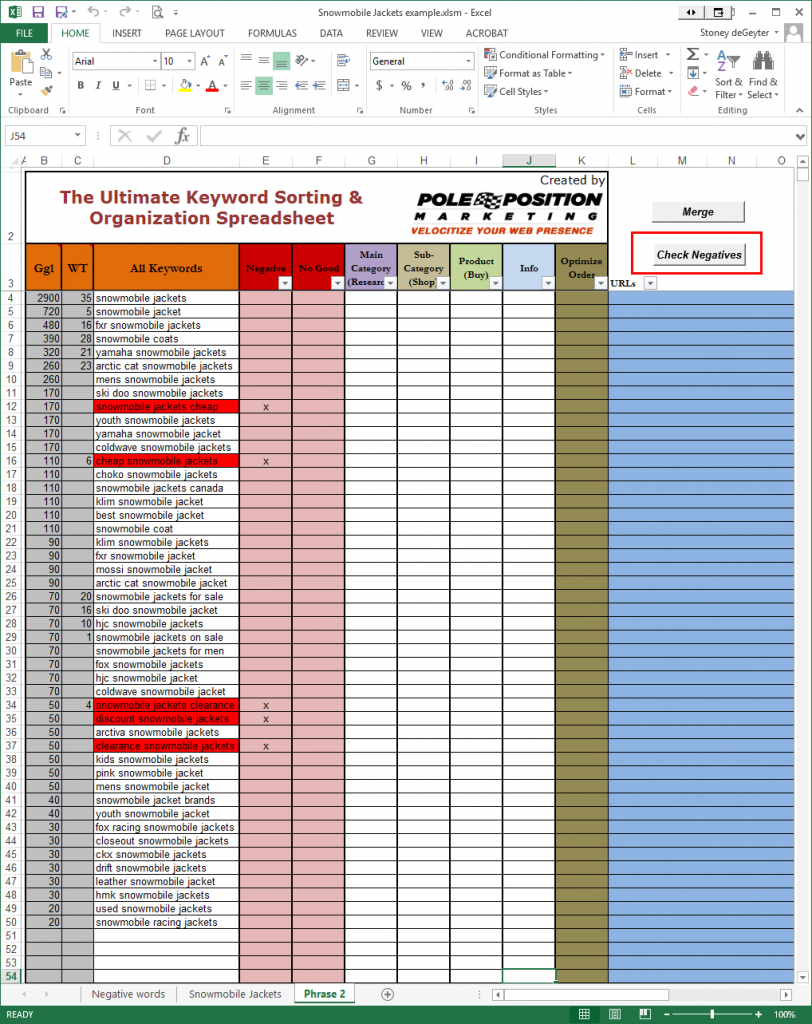
If you accidentally added a negative word that does not belong, no worries. Just remove it and re-click “Check Negatives” to correct.
Important: Don’t leave any empty cells in the negative keywords list. If you remove a keyword be sure to fill in the blank spot.
If you have a lot of negative words highlighted and want to get them out of your way, the spreadsheet has a filter option that lets you hide them all. Click the filter icon at the bottom right corner of the negative column heading, then uncheck the “x”.

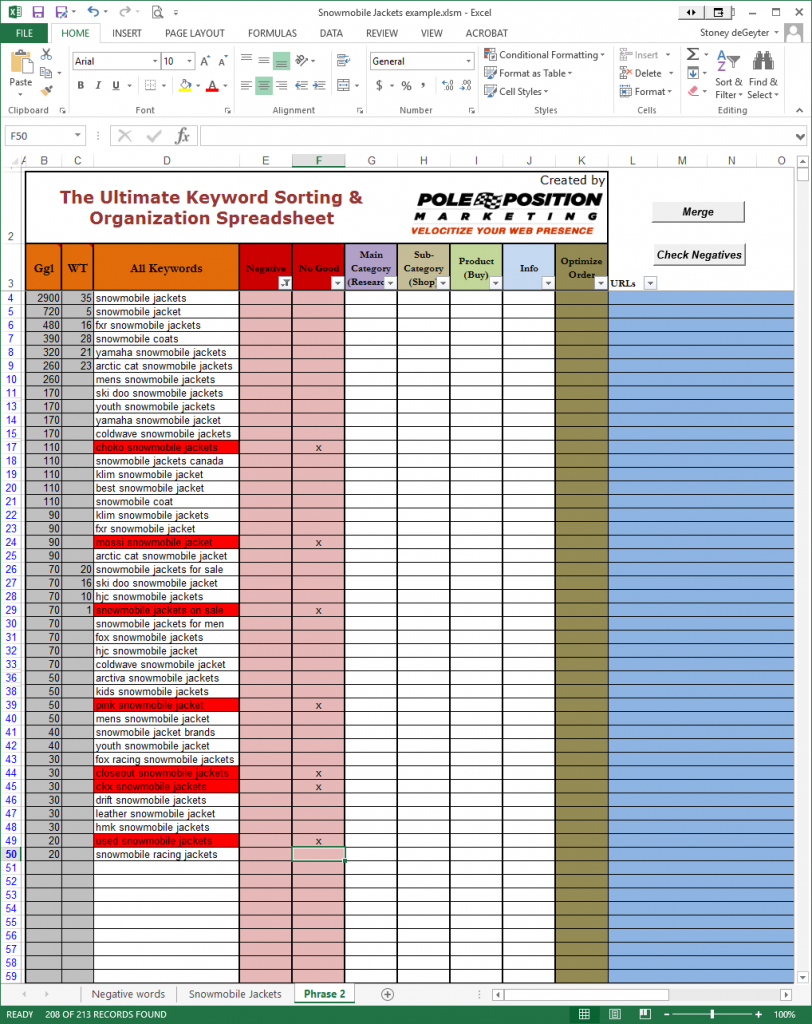
In most cases, using negative keywords is not enough. You will need to manually go through and eliminate keywords that aren’t any good for optimization to your site. Simply place an “x” in the “No Good” column and your phases automatically highlight red.
Note: Do not manually add “x’s” to the Negative column. If you run the Check Negatives macro again these will automatically be removed. Only manually mark negatives using the No Good column.
You can then filter out all “No Good” keywords just as you did with the negative words, leaving you only with phrases that you believe are worth optimizing!
Categorizing Into Shopping Funnels
I’ve written about the Research, Shop and Buy funnels for keywords before. You need to be familiar with that before using these categories.
The general idea is that you want to categorize each keyword into one of these funnels. If you mark phrases for one category at a time, you can then hide each category using the filters, making it easier to sort through and categorize the remaining keywords.
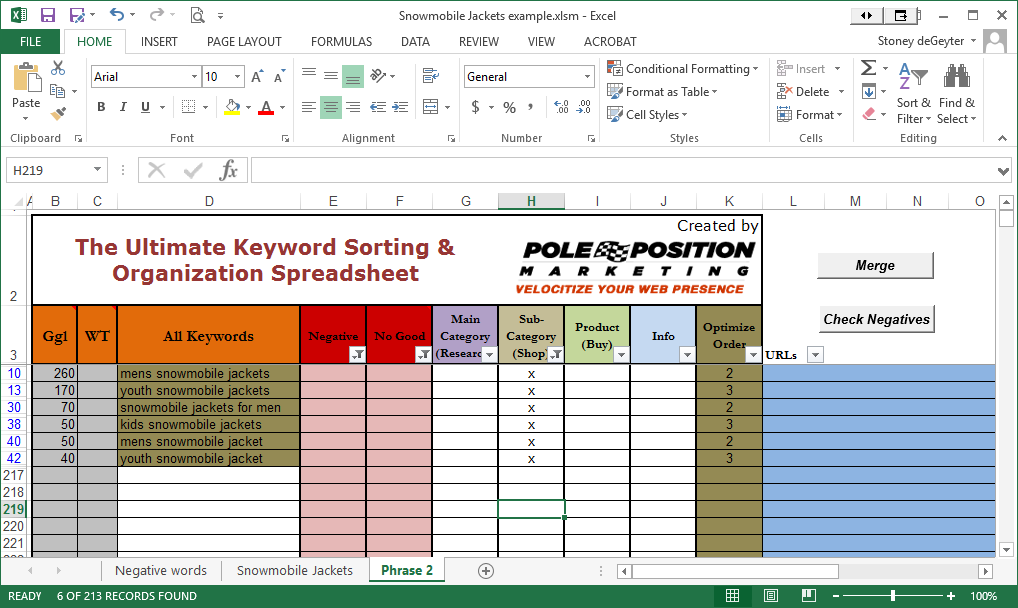
Once you’re done, your spreadsheet will look something like this:
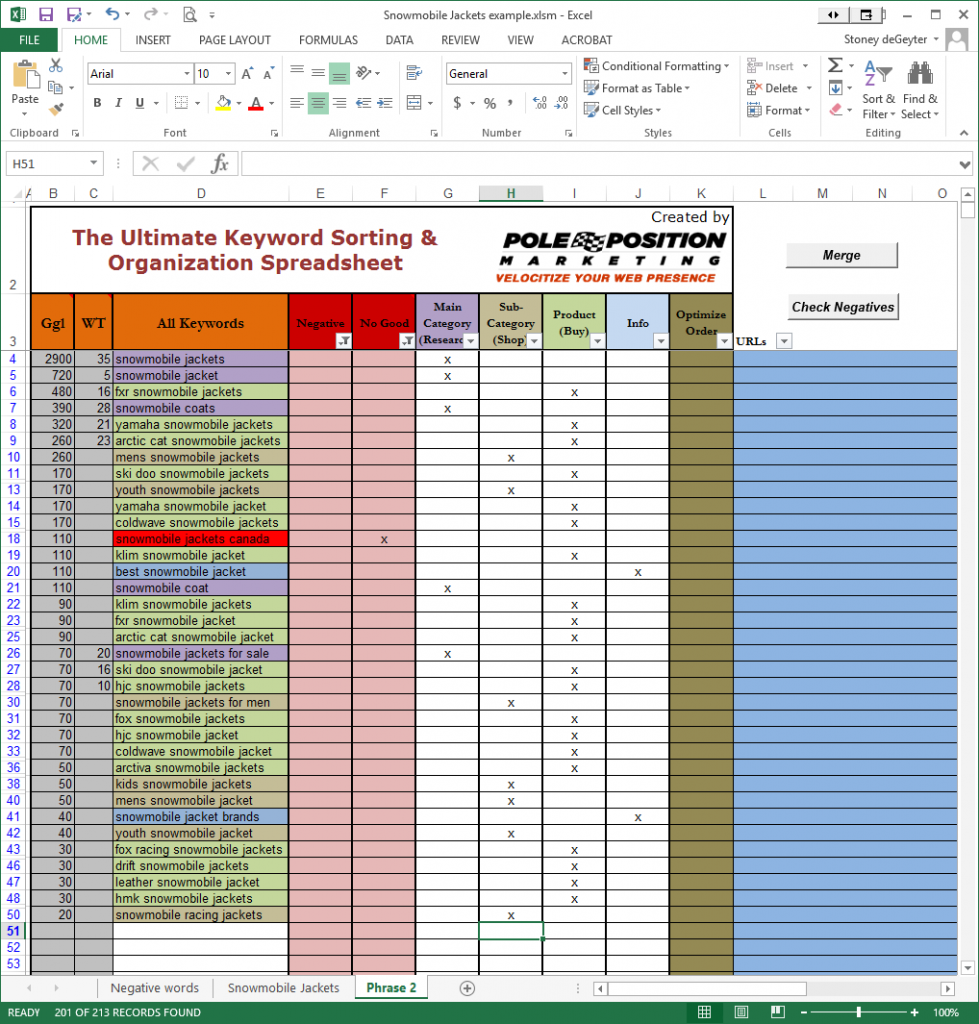
As you can see, the phrases auto highlight based on the category they’re tagged in. As I said before, it’s up to you to be familiar with what the categories mean and how best to organize them. This tool just makes it easy.
Assigning Keywords to URLs
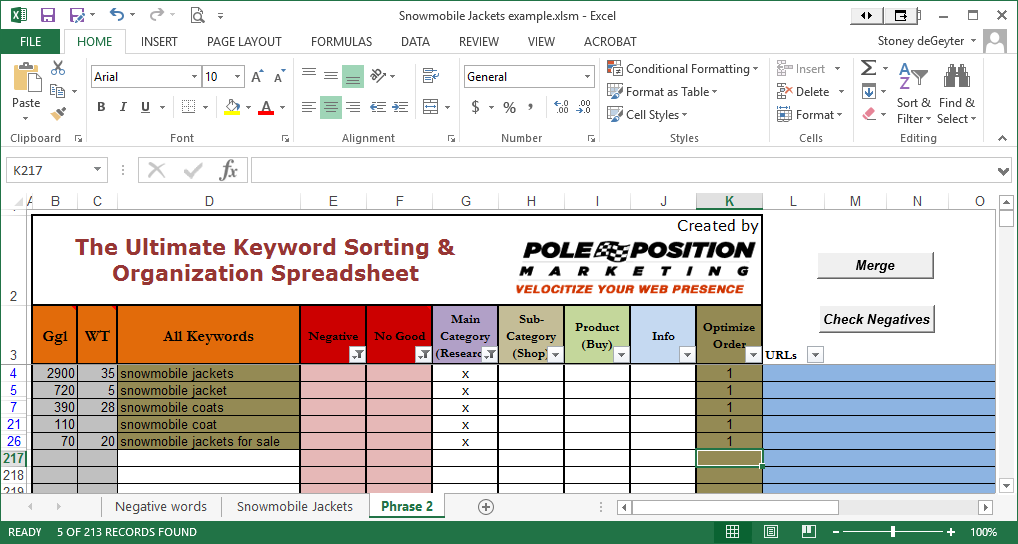
There are two more columns of the sheet we have yet to use: The Optimize Order and URL columns. The first step is to categorize the keywords into an optimized order. Since there are so few main category terms in this sheet, we’ll give them all an optimized order of “1.” This means it’s the highest priority.
We are going to use the filter option to show us only the phrases that are marked for the main category. That makes it easy to assess the priority number in the optimize order column.
That was easy, so let’s move on to the next group. I start by sorting by sub-category. Looking through the list, I see two distinct groups, one for men and one for youth.
I’ve given each group it’s own priority order. When you have more than just a handful of keywords in each categorization group this can be a more daunting task. You might have 10-20 different groups of keywords. The goal is to make sure each optimized group of keywords is very highly relevant when used together.
I only need to add the URLs to the highest search volume phrase for any group. When I filter by the optimization order, I’ll see the URL assigned to that entire group.
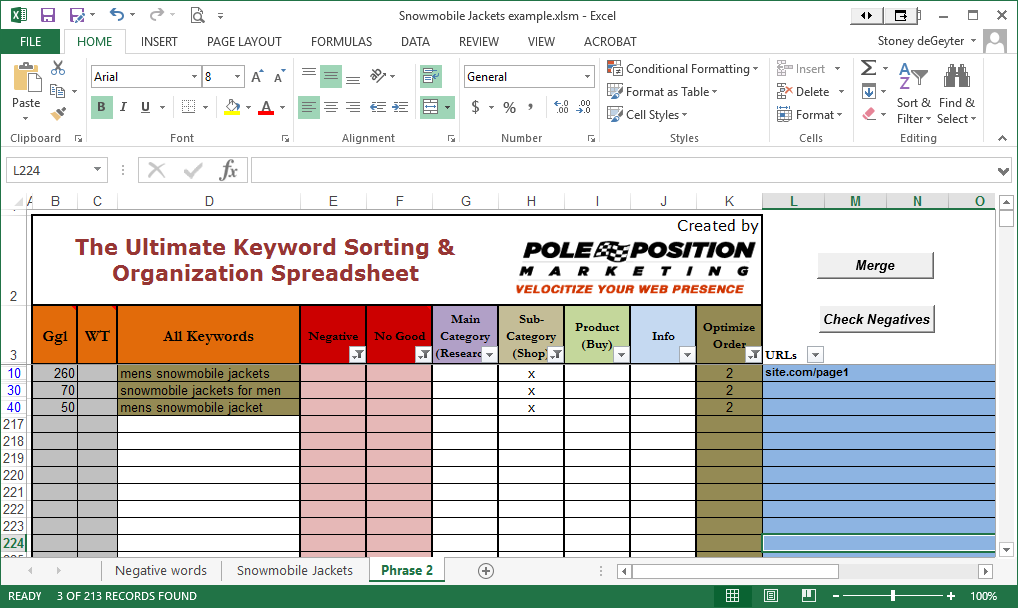
Now it’s just a matter of finding the best URLs to optimize for each group. You can also filter by URL if you just want to see the URLs and the primary topic of the keywords being optimized.

A lot of keyword research tools have their own filtering options, but this sheet allows you not only to hold keywords from different sources, it also allows you to filter and sort easily without completely removing keywords. Many times we’ll go back to our research to find phrases we initially eliminated which are now viable for social media topics, etc.
We typically use one sheet for each topic and keep them saved in a specific location. Call me a pack rat, but I have found these spreadsheets a valuable resource much later on down the road, not just as we are doing immediate optimization.
4 Responses to The Ultimate Keyword Sorting and Organization Spreadsheet