

Every website owner at some point realizes the importance of site speed. A speedy web page is not only preferred by your visitors but also by search engines. As you may know, page speed is a ranking factor in Google’s algorithm.
The problem is, many of the third party tools we use to analyze our sites and make them better have the nasty side effect of slowing them down. Fortunately, there’s a solution that allows you to take advantage of these tools without dragging down your site: Google Tag Manager.
What Are Tags?
When you hear the word “tag” in relation to your website, you may think about your blog tags or maybe the title and meta description tags you optimize for search engines. That’s not what we’re talking about here.
When we talk about tags in this instance, we’re referring to the snippets of code that are added to your site to send information to a third party. A classic example is Google Analytics. By putting the GA tracking code, or “tag,” in your website’s code, you can access a ton of data about your site through the Analytics platform. Other examples are Google AdWords, Hotjar, Kissmetrics, and Optimizely. The more of these tools you use, the more you call to external files, which is what causes site slowdowns.
What is Google Tag Manager?
Google Tag Manager (GTM) is a FREEtag management solution that resolves this issue. It’s used to control all your Analytics and marketing tags from a single place without having to interact with your website code. It’s like a digital basket, keeping all of your analytics and marketing tags side by side while keeping your site code untouched.
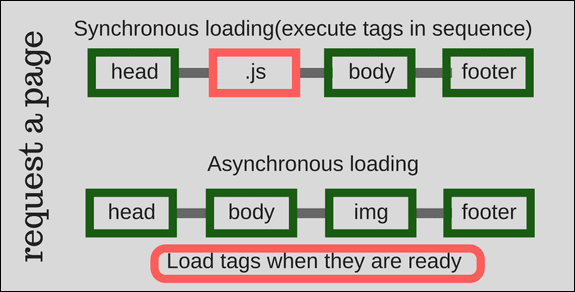
Tag Manager uses a single JavaScript code to control these tags, reducing the number of requests to external files. Additionally, the Tag Manager script loads asynchronously, which means it loads tags whenever they are ready, without waiting for other tags to fire.
This gives you the power to control tags, along with when and where to fire them. For instance, if you wanted to track all the outbound links on your website without using GTM, you would have to place the code on every page where there is an outbound link. With tag manager, you can create a tag and specify a trigger that would fire when a user clicks the outbound link. Therefore, you wouldn’t have to load it before any user interaction.
Or say you have an ecommerce website and report conversions to Google Analytics, AdWords, and other tools. Without GTM, you would need to deploy each tool individually, requesting the purchase information multiple times. Tag Manager provides a single point “data layer” providing the purchase information to each on a single request.
Installing Tag Manager on Your Website
According to W3Techs, Google Tag Manager is used by 6.9% of all the websites on the internet, and the number is increasing day by day. You can install GTM on your website in a matter of minutes. All you need to do is to create a Tag Manager account and insert the Tag Manager container code on your website.
Google Tag Manager installation consist of the following steps.
- Sign up for a Google account if you don’t have one.
- Go to https://tagmanager.google.com
- Create a tag manager account.
- Copy the container code snippets.
- Paste on all pages of your website.
If you are using WordPress, you can follow the step-by-step guide to installing Google Tag Manager on WordPress.
Moving your tags to Google Tag Manager
Once you install GTM on your WordPress site, it’s time to move your tags like Google Analytics, AdWords, and Shareaholic to it.
The easiest way to do this is to remove the tags wherever they are currently placed on your website and create separate tags in GTM for each one.
For example, if you have Google Analytics tag installed on your site, you can go to your WordPress header.php file or deactivate the Google Analytics plugin. Then create a Google Analytics pageview tag in tag manager.
Let’s do this to get started with GTM.
Step 1: Remove the Google Analytics tracking code from your website. The analytics tracking code would be either in header.php file or installed via plugin. Go to the WordPress header.php file and remove anything that looks similar to:
<script>>
(function(i,s,o,g,r,a,m){i[‘GoogleAnalyticsObject’]=r;i[r]=i[r]||function(){
(i[r].q=i[r].q||[]).push(arguments)},i[r].l=1*new Date();a=s.createElement(o),
m=s.getElementsByTagName(o)[0];a.async=1;a.src=g;m.parentNode.insertBefore(a,m)
})(window,document,’script’,’https://www.google-analytics.com/analytics.js’,’ga’);
ga(‘create’, ‘UA-61163351-8’, ‘auto’);
ga(‘send’, ‘pageview’);
</script>
Step 2: Login to your GTM account and select the specific container.
Step 3: Click on the create New Tag button.

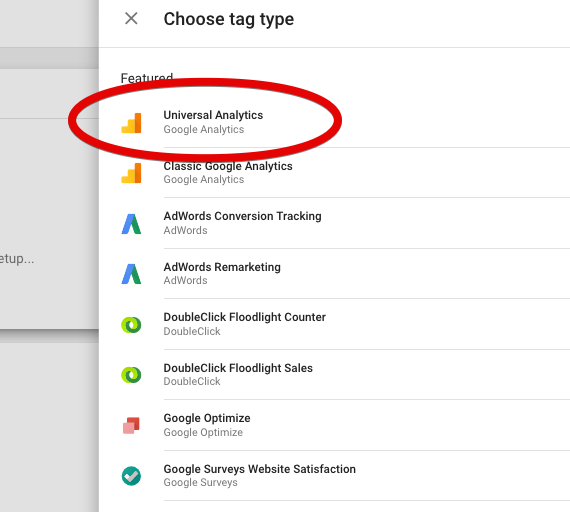
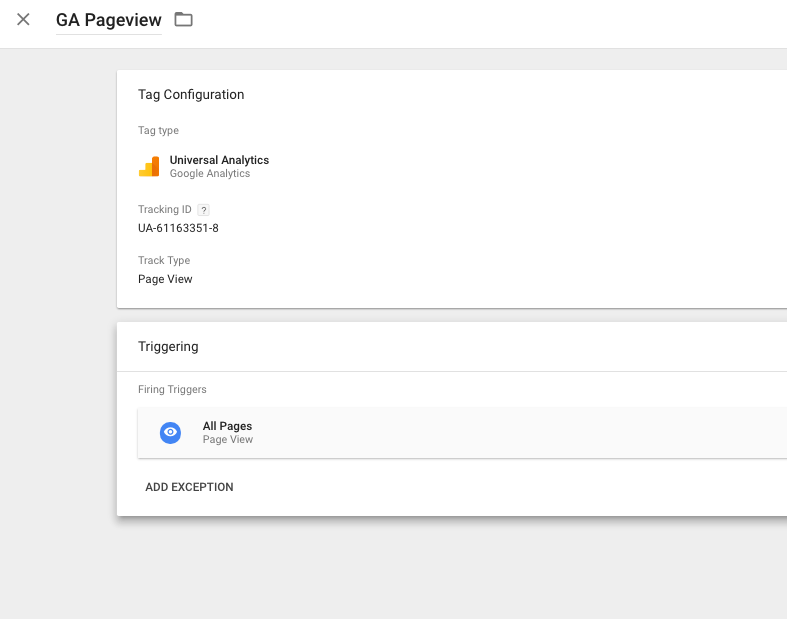
Step 4: Enter the tag title as GA Pageview, click on the tag configuration, and select the tag type as Universal Analytics.
Step 5: Enter your Google Analytics tracking ID, and from the triggering option select the trigger to fire on all pages.
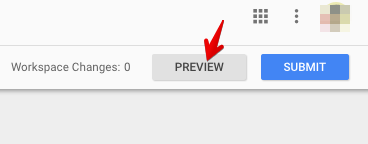
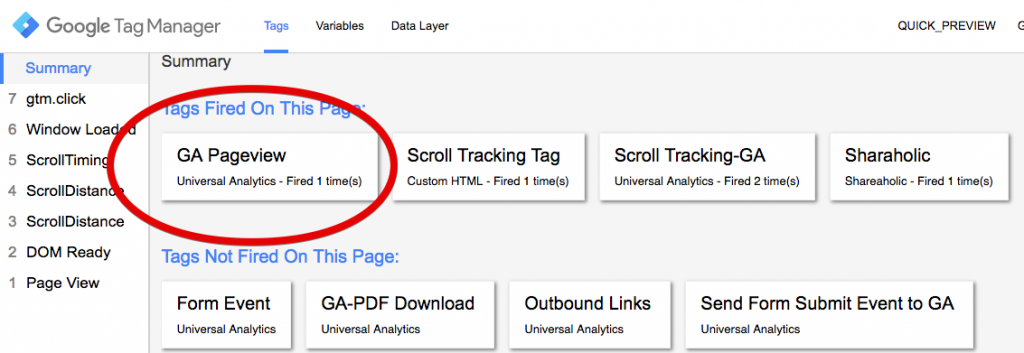
Step 6: Save this tag. Now click on preview button from the top right and open your website in a new tab.
Step 7: If you have successfully installed the GA Pageview tag, your tag should fire on the page and look similar to this:
Similar to the Google Analytics Pageview tag, you can shift all the manually added Analytics and marketing tags to GTM.
Improve Speed & Your Site’s First Impression
If you have overburdened your website with tags and expect it to load in a matter of seconds, GTM could be your ultimate tool to improve your website speed and deliver a good first impression. If you are not using Google Tag Manager yet, you can get a quick start from here.